
In today’s tech-driven world, visualizing projects and models in 3D has revolutionized industries like architecture and industrial design, and it’s also accessible to the general public. AutoCAD, a leading tool in computer-aided design, has evolved to meet these demands, enabling the transformation of ideas into 3D models for augmented reality in just one hour.
What is Augmented Reality?
Augmented Reality (AR) overlays digital information on the real world, creating an interactive visual experience that combines both elements in real time. Unlike virtual reality, which creates a completely artificial environment, AR adds layers of visual information to our natural surroundings.
AR is used in various sectors, including entertainment, education, medicine, and notably, design and engineering. In these fields, AR offers a valuable tool for visualizing projects and objects in their intended environments, allowing for real-time adjustments and improvements.

For example, in education, AR can turn a traditional class into an interactive experience where students can explore anatomical models, historical reconstructions, or complex chemical structures overlaid in the classroom.
AR enhances communication and collaboration in design projects. Engineers and architects can overlay CAD models of a part or structure directly at its future location, allowing everyone involved to visualize the final outcome before construction or manufacturing begins. This reduces misunderstandings, simplifies communication, and improves project efficiency.
AutoCAD’s Role in Augmented Reality
AutoCAD, developed by Autodesk, has been a leading CAD tool since 1982. Known for its capabilities in technical design, 2D drawing, and 3D modeling, AutoCAD now integrates AR technology.
With AutoCAD, users can export models directly to AR applications, making design reviews more efficient and collaborative. For instance, an architect can take a 3D model of a proposed building to the construction site and, through an AR device, overlay the model onto the actual terrain. In a more domestic setting, one can design a customized decoration for a lamp and see how it will look on a desk, allowing for adjustments in color, design, or size.
AR devices allow anyone to visualize the design jointly, facilitating a common understanding without lengthy explanations. An AR model is worth a thousand words.
Step 1: From Idea to Paper (or Screen)
The design process in AutoCAD begins with an idea, translated into a precise technical drawing or conceptual sketch. This lays the foundation for the 3D model.
Every AutoCAD project starts with creating 2D drawings. Opening the application provides a ready space, and with a clear understanding of units and the drawing’s origin point, users can select the line tool to draw the first dimension, ensuring precision with orthogonal lines.
Using navigation tools, users can rotate the viewpoint to draw different views of the design—left, right, front, or rear. This process is repeated to complete all necessary views.
AutoCAD handles details with high precision, crucial for preventing discrepancies during manufacturing. AutoCAD’s precision ensures designs meet technical standards from the start, reducing the need for later corrections.
AutoCAD’s universality is also a significant advantage. Vast user communities offer support in the form of downloadable blocks from online repositories, allowing users to incorporate specific parts or profiles into their designs seamlessly.
Step 2: 3D Modeling
Transforming a 2D design into a 3D model in AutoCAD is straightforward. The “Extrude” function converts a flat object into a three-dimensional one by extending the shape in the z-dimension, giving it volume. Tools like “Revolve” help create circular designs, making 3D modeling quick and simple.
Once the 3D model takes shape, the next step is to add materials and textures. AutoCAD offers a library of materials mimicking properties like metal, glass, and wood. Custom textures can be added through images, transferring physical properties to the model.
Preparing the 3D model for AR is simple if it is placed at the origin point and the units of work are decided. Scaling tools allow easy adjustment of size to fit the desired parameters.
Step 3: Exporting for Augmented Reality
Once the 3D model is fully developed in AutoCAD, it can be exported for use in AR applications. Autodesk provides tools for viewing 3D elements through mobile applications, but AutoCAD’s compatibility with various environments is its biggest advantage.
Choosing the right file format is crucial for AR integration. AutoCAD supports industry-standard formats like FBX, OBJ, and STL, ensuring models are exported with necessary properties like meshes, textures, and material definitions. The chosen format depends on the AR platform used.
Third-party plugins and conversion tools can help move from a specific format to the one required by the AR device. AutoCAD’s support for standards ensures designs made in AutoCAD are valid wherever needed.
Step 4: Visualization in Augmented Reality
The final phase is visualizing the model in AR. This step is simple and striking, allowing users to experience the project in a real context and make final tweaks before completion.
Once the 3D model is optimized and exported in the appropriate format, it is loaded into an AR application. This involves importing the model file into an app that can render AR on compatible devices like phones, tablets, or AR glasses.
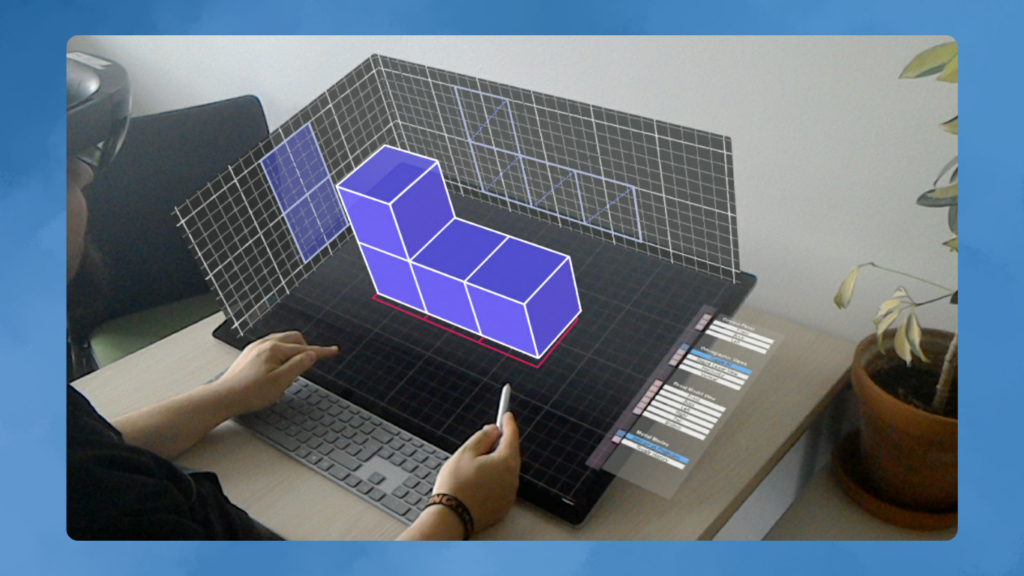
On Apple devices, Reality Composer accepts the model natively. Pointing an iPhone or iPad at a flat surface brings the design to life. Users can focus on proportions, check for errors, evaluate colors and materials, and prepare for the next stage.
For projects requiring specific location visualization, recording a video of the reality overlay with the new design can be simpler than meeting at the site. This allows for creative presentations of the design using photos, videos, and animations without fixing it in one place.
Benefits of AR in Computer-Aided Design
Integrating AR into CAD has revolutionized project conception, development, and presentation. AutoCAD, as a leading CAD tool, embraces this technology, emphasizing efficiency, precision, and communication in design and engineering.
Spatial awareness of a component is not always easy to achieve. Properly dimensioned and represented plans are one way, but a real-world representation of a design has tremendous power in communication.
AutoCAD makes the transition from an idea to displaying it in AR a matter of less than an hour. Autodesk’s tools offer much more than covered here, yet their ease of use for certain projects is remarkable. By overlaying digital models in the real world, users can see how objects interact with their physical environment. This is useful in fields like architecture and civil engineering, and for preparing designs for 3D printing. With AutoCAD, the same file serves both the printer and viewing the model on a desk before it becomes a reality. Augmenting reality in AutoCAD is that easy.

Subtly charming pop culture geek. Amateur analyst. Freelance tv buff. Coffee lover